
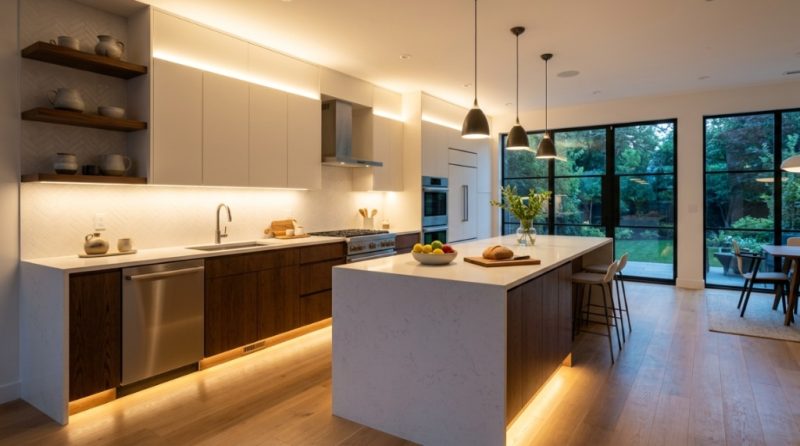
You walk into your kitchen, flip the switch, and shadows. Dark corners. A workspace that feels more like a cave than a cooking sanctuary. You are not alone. Most kitchens suffer from poor overhead lighting that creates harsh glare and deep shadows on countertops. The problem is clear: you need task lighting that is both effective and affordable. The solution lies in learning how to brighten your kitchen with LED strips. These versatile lights offer targeted illumination, enhance your décor, and cost pennies a day to run. Whether you rent or own, LED strip lighting is the quickest upgrade you can make to transform a dim kitchen into a bright, functional hub.
Why Should You Use LED Strips Instead of Overhead Lights?
The Science of Task Lighting vs. Ambient Lighting
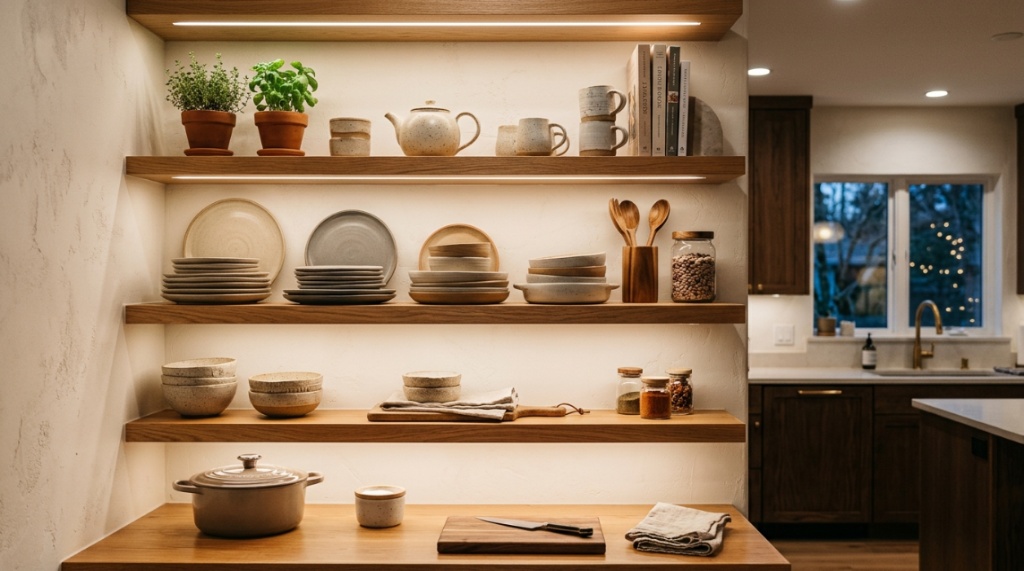
Overhead lights create ambient lighting. They fill the room with a general glow but leave your actual work surfaces in shadow because your body and cabinets block the light. LED strips provide task lighting, which places light exactly where you need it. When you brighten your kitchen with LED strips, you eliminate shadows on cutting boards and countertops, reducing eye strain and improving safety.
Energy Efficiency and Longevity
Traditional under-cabinet fluorescent lights consume more energy and burn out faster. LED strips use up to 80% less electricity and can last 50,000 hours or more. That means no frequent bulb changes and lower utility bills—especially important in California, where energy costs run high.
Flexibility for Any Kitchen Layout
Unlike rigid light fixtures, LED strips come in rolls that you can cut to custom lengths. This flexibility means you can install them under cabinets, inside drawers, above cabinets, or even along toe kicks. No kitchen is too awkwardly shaped.
What Types of LED Strip Lights Work Best in a Kitchen?
Warm White vs. Cool White vs. RGB
For kitchens, choose warm white (2700K–3000K) for a cozy, inviting glow or cool white (4000K–5000K) for crisp, daylight-like visibility. RGB strips are fun for accent lighting but are not ideal for serious food prep. Stick to high-CRI (Color Rendering Index) strips—90 CRI or higher—so vegetables and meats look natural under the light.
Waterproof vs. Non-Waterproof Strips
Kitchens are humid environments. For under-cabinet use near sinks or stoves, choose IP65-rated waterproof strips to protect against moisture. For dry locations like above cabinets, standard IP20 strips work fine. Always check the adhesive quality; silicone-coated strips offer better durability near heat sources.
Plug-and-Play vs. Hardwired Systems
Plug-and-play LED kits with adhesive backing and USB power adapters are perfect for renters. Hardwired systems require electrical work but offer cleaner installations with no visible cords. Decide based on your skill level and whether you own your home.
How to Plan Your LED Strip Installation for Maximum Brightness
Measure Your Cabinets Accurately
Use a tape measure to record the length of every cabinet you want to illuminate. Add 10% extra length for corners or errors. Most LED strips come in 16-foot rolls. For a standard kitchen, plan for 20–30 linear feet of strip lighting to properly brighten your kitchen with LED strips.
Map Out Power Source Locations
Locate the nearest electrical outlets under your cabinets. You will need a power adapter for each section. Consider using extension cables or connectors to bridge gaps between cabinets. Avoid overloading a single adapter; check the wattage ratings on your LED strip packaging.
Decide on Placement: Under Cabinet, Above Cabinet, or Inside Glass
Under-cabinet placement is the most effective for task lighting. Above-cabinet placement creates a floating effect that makes your kitchen feel taller. Inside glass-front cabinets adds a museum-like showcase for your dishes. Combine placements for layered lighting that offers both function and drama.
Which Brightness Level (Lumens) Do You Need for a Kitchen?
Understanding Lumens vs. Watts
Watts measure energy use. Lumens measure brightness. For kitchen task lighting, aim for 450–800 lumens per linear foot. This range provides enough light to read recipes clearly and spot food debris on countertops without causing glare.
Comparing LED Strips by Lumen Output
| Application | Recommended Lumens per Foot | Best LED Density |
|---|---|---|
| Under-cabinet task lighting | 450–800 | High-density (60+ LEDs per meter) |
| Above-cabinet ambient lighting | 200–400 | Standard density (30 LEDs per meter) |
| Inside glass cabinets | 100–300 | Low density (18–30 LEDs per meter) |
| Toe-kick accent lighting | 100–250 | Standard density |
Why More LEDs Per Meter Matters
Higher density strips (60 or 120 LEDs per meter) produce fewer visible hot spots and more even illumination. For a professional look, never compromise on density. Cheap strips with 30 LEDs per meter create a dotted, cheap appearance that ruins the effect.
How to Install LED Strips Under Kitchen Cabinets: Step-by-Step
Step 1: Clean and Prep the Surface
Use rubbing alcohol to remove grease and dust from the underside of cabinets. Wait five minutes for the surface to dry completely. A clean surface ensures the adhesive sticks for years. In California kitchens, where humidity varies, this step is critical to prevent peeling.
Step 2: Cut and Connect the LED Strips
Measure your cabinet length. Cut the strip at the designated copper connection points (usually every 1–2 inches). Use L-connectors or extension wires to turn corners. Test the connection with the power supply before peeling the adhesive backing.
Step 3: Apply and Secure the Strips
Peel the 3M tape backing and press firmly along the cabinet edge. For extra security, especially near stoves, add small mounting clips every 12 inches. Route wires neatly and hide them with wire clips or cable raceways.
Step 4: Connect to Power and Test
Plug the strips into the power adapter. Check every section for consistent brightness. If some segments are dim, you may have a voltage drop issue—install a second power adapter for longer runs.
Can You Install LED Strips Without an Electrician?
Yes, With Plug-and-Play Kits
Most affordable LED strip kits include a plug-in power adapter and adhesive backing. You do not need an electrician for these systems. Simply measure, cut, stick, and plug. This makes it easy to brighten your kitchen with LED strips California residents can install on a Saturday afternoon without hiring help.
When You Should Call a Professional
Hardwiring LED strips into your home’s electrical system requires knowledge of junction boxes and voltage requirements. If you plan to run strips along multiple cabinet sections without visible cords, hire a licensed electrician, especially if you live in a California home with older wiring.
How to Control Your LED Strips (Dimmers, Remotes, Smart Home)
Dimmer Switches for Adjustable Brightness
Install a dimmer controller between your power supply and LED strip. This allows you to reduce brightness for ambiance during dinner or increase it for cooking. Make sure your LED strip and dimmer are compatible—not all strips dim smoothly.
Remote Controls and App Connectivity
Many LED kits come with a remote control for changing brightness and color temperature. Higher-end systems use smartphone apps or voice control via Alexa or Google Home. You can set timers, schedules, and scenes. For example, program your strips to turn on automatically at 6 PM. Adding layered lighting is one of the easiest ways to inject personality and warmth into your space. If you are working to set up the new house, starting with high-impact zones like the kitchen will instantly make the entire property feel finished and welcoming.
What Are the Best Places to Install LED Strips in a Kitchen?
Under Upper Cabinets (The Classic Choice)
This placement eliminates countertop shadows. Mount the strip near the front edge of the cabinet so light shines directly on the counter, not on the backsplash. For best results, install an aluminum channel to diffuse the light and protect the strip from grease.
Above Upper Cabinets (The “Floating” Effect)
Placing LED strips on top of cabinets and aiming upward creates a soft glow on the ceiling. This technique makes small kitchens feel taller and more open. Use cool white for a clean, modern look or warm white for a cozy restaurant vibe.
Inside Glass-Front Cabinets
Show off your matching dishware or glassware with discrete strips inside glass-front cabinets. Choose warm white at a low brightness to avoid a sterile museum feel. Install strips on the top interior edge of the cabinet, facing downward.
Along Toe Kicks (The Night Light)
Install waterproof LED strips along the base of your cabinets near the floor. This provides a subtle night light that illuminates the floor, reducing the need for overhead lights during late-night snack runs. Use motion sensors for automatic activation.
How to Avoid Common LED Strip Installation Mistakes
Mistake #1: Ignoring Voltage Drop
LED strips lose brightness over long runs. If your kitchen has cabinets longer than 16 feet, you will need power injection points or multiple adapters. Symptoms of voltage drop include yellowing at the far end or flickering. Always test your strips before permanent installation.
Mistake #2: Using Cheap Adhesive
Standard 3M tape often fails in humid California kitchens. Upgrade to outdoor-grade double-sided tape or use aluminum mounting channels that hold the strip mechanically. This prevents sagging and peeling over time.
Mistake #3: Forgetting About Heat
Do not install LED strips directly above your stovetop or oven. Excessive heat will damage the LEDs and adhesive. Stop the strip at least 12 inches away from heat sources. Use heat-resistant strips rated for high temperatures if you must light that area.
How to Brighten Your Kitchen with LED Strips California Residents Recommend
Why California Kitchens Benefit Most
California’s strict energy codes (Title 24) encourage low-wattage lighting. LED strips comply easily and can even qualify for rebates through local utility programs. Many California homeowners choose LED strips to meet energy standards while improving home value.
Local Climate Considerations
Coastal humidity and inland heat both affect adhesive performance. In San Diego or San Francisco, use waterproof, outdoor-rated strips. In inland areas like Sacramento or Riverside, focus on heat-resistant models. Always read product descriptions for temperature and humidity tolerances.
Where to Find Quality Affordable Options in California
To find reliable products that balance cost and performance, check out what experts say about the brighten kitchen with LED strips California options available. This resource compares top-rated kits by brightness, durability, and California energy compliance, saving you guesswork.
Frequently Asked Questions
Can I leave LED strip lights on all night?
Yes, LED strips are designed for long hours of use and generate very little heat. Leaving them on all night is safe, but it will reduce their lifespan slightly. Consider using a timer or motion sensor to turn them off automatically when not needed.
Do LED strips need a special dimmer?
Standard LED strips require a compatible LED dimmer, not a traditional incandescent dimmer. Check the packaging for “dimmable” specification. Using the wrong dimmer can cause buzzing, flickering, or damage to the LEDs.
How do I clean LED strips in a kitchen?
Unplug the strips first. Use a dry microfiber cloth to remove dust. For greasy buildup near cooking areas, lightly dampen the cloth with water and a drop of dish soap. Do not spray liquid directly on the strips. Always dry completely before reconnecting power.
What is the best color temperature for a kitchen?
Most kitchen experts recommend 3000K (warm white) for a cozy feel or 4000K (neutral white) for balanced task lighting. Avoid 5000K or higher, which can look clinical and harsh. Choose adjustable color temperature strips if you want flexibility.
Can I install LED strips if my cabinets have a lip or rail?
Yes. If your cabinets have a front rail, mount the LED strip on the underside of the rail facing downward, or use a channel that angles the light toward the counter. Alternatively, install the strip on the back of the rail so light shines forward.
How much does it cost to run LED strips in a kitchen?
An average 20-foot LED strip running 6 hours per day costs about $10–$15 per year in electricity. That is roughly 1–2 cents per hour. Compared to halogen under-cabinet lights, which cost 5 times more, LED strips are extremely affordable to operate.
Will LED strips damage my cabinets or paint?
No, LEDs emit very little heat, so they will not warp wood or peel paint. However, the adhesive on cheap strips can leave sticky residue when removed. Use mounting channels or painter’s tape as a protective barrier if you are concerned about damage.
Conclusion
You now have everything you need to eliminate dark spots and transform your kitchen into a bright, welcoming space. By choosing the right LED strips, planning your layout carefully, and installing them correctly, you can achieve professional-quality lighting without breaking your budget. Remember to measure twice, prioritize high-density and high-CRI strips, and always test before final installation. Whether you are a weekend DIYer or a seasoned renovator, the ability to brighten your kitchen with LED strips is one of the most rewarding home improvements you can make. Start by checking the best affordable options available in California, then grab your measuring tape and let there be light—exactly where you need it.
