Puncturing a tire while pedaling is never a good experience. That’s why it’s best to be prepared. Follow our advice on how to change the inner tube of your bicycle.
What tools do you need to change the inner tube of the bicycle?
In order not to be surprised by a puncture, which can ruin your bike ride, there are some tools you can take with you to change the inner tube of the bicycle. These tools are very comfortable and practical whether you use the bicycle in the city or for cycle tourism, facing longer and more demanding journeys. Because a puncture can happen to everyone and it is better to be equipped for any eventuality.
Don’t worry, these are a few tools, but very useful:
- Spare air chamber;
- Lever to remove the tire;
- CO2 bottle to inflate the inner tube.
Are you wondering how you can take everything you need to change the inner tube of your bicycle with you? You have two solutions to choose from, which are:
A saddlebag, which has the advantage of being very compact and fits right under the seat of your bike without creating bulk. However, it has the disadvantage of being not very large;
A tool bottle, which is much larger but takes the place of a bottle. If you don’t have these tools, you can buy them online right away. On Amazon, for example, you can find everything you need to ride a bike at affordable prices: from accessories to clothing.
How to change the inner tube of the bicycle
After having seen which tools you absolutely must have with you, now let’s review the operations you need to carry out to change the inner tube of the bicycle in the event of a puncture. Here are all the steps you need to take:
Remove the wheel
First, you need to disassemble the wheel of your bike. Proceed by lowering the lever that is on the axle of the wheel and using it to unscrew the pin itself so that the wheel comes out of the fork. If you have to take the rear wheel apart, you need to bring the chain to the smaller sprocket, so it will be easier for you to get the wheel out. Then, push back the gearbox with one hand while with the other hand remove the wheel. To prevent the wheel from getting stuck in the brake as you try to remove it, lift the lever on the brake caliper arch. This way, you widen the headband, and you can remove the wheel without problems.
Remove the tire
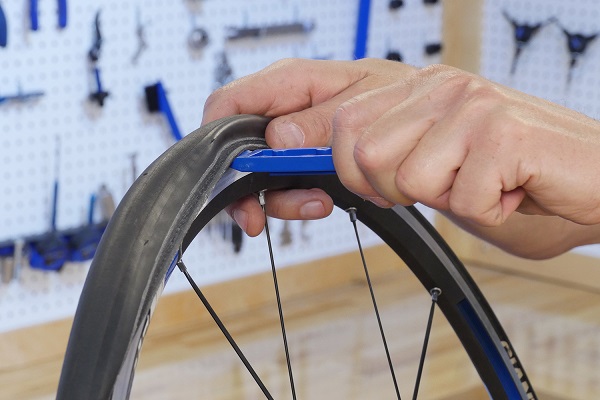
To remove the tire, you must completely deflate the tire. This operation allows you to move the tire away from the rim. Once the tire is deflated, slide the lever under the tire, being careful not to pinch the inner tube, and slide it along the rim.
Remove the inner tube
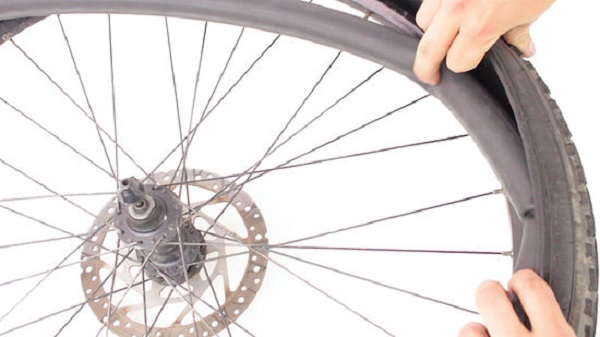
Once you have removed the tire, you can move on to removing the inner tube. Remember to leave the place where the valve is for last.
Find the cause of the puncture
Once you have removed the inner tube, you can look for the object that caused the puncture. To find it, you have to turn the tire inside out and run your fingers over its surface. When you have found the item, all you have to do is remove it and check the damage. If the hole is small, you can still use the tire. However, if the hole is too large, continuing to use such a damaged tire could be dangerous. Therefore, you will be forced to replace it.
Fit the new inner tube
You are now ready to mount the new tube. Just unscrew the washer that stops the valve and insert the valve into the hole on the rim. Then, you have to place the tube on the rim, taking care that it does not leave any creases or twists.
Mount the tire
Now it’s up to the tire to be reassembled. You have to slide it into the rim, one side at a time and take care not to pinch the new tube.
Inflate the tire
To inflate the tire, use the CO2 canister that we advised you to always carry with you along with the other tools that can help you in the event of a puncture. How does it work? First, you have to screw the tap onto the valve of the bladder and then the CO2 canister into the valve. So, turn on the tap and within seconds, your gum will be swollen. Once the bladder is inflated, turn off the tap. Finally, unscrew the tap from the valve, leaving it attached to the CO2 can, so you can use it again.
A word of warning: when you inflate the tire, the CO2 can tends to cool down and become covered with ice. Therefore, handle them carefully.
Mount the wheel
The work on changing the inner tube of the bicycle is almost done. Now all you have to do is close the valve of the inner tube and put the wheel back on the bike. You can proceed in the same way as you took it apart and once you put it back, you just have to remember to lower the brake lever.


