This article is an introductory material that gives a brief description of simple but critically important items for professional photography. To beginners, such advice will help avoid many mistakes and quickly approach professionals, and also encourage them to further study the necessary materials.
If you want to make competent photos, these tips, tricks, and techniques from the top-class photographer, we will help you improve your skills.
Whether you want to take pictures for design work, take pictures of models for illustrations or do anything else – these tips will be useful to everyone.
In the next 15 points, we will talk about equipment, lighting, and editing – all you need to know to get the best photos.
1. Draw up a plan
Before you tackle the camera, make a couple of sketches or a storyboard of what you want to get. This will adhere to a certain idea during the shooting.
2. Background
The continuous background color in the studio will make sure that the subject is a focal point and it will be easier to separate it if you need to create a composition.
Gray is an excellent color, as it is well suited for most situations. You can also shoot on a white background if you need a lighter composition or on a black for dark shots.
Whichever background you choose, make sure that the background color does not match the color of the subject.
3. Light sources
Also, if you plan to make a composite image, you need all the objects/people on it to be shot with the same lighting source (s).
Before you press the camera shutter button, think about where the subject will be located and at what angle the light will fall on it. Perhaps it needs to be illuminated from above or below?
Also it is necessary to think about the type and color of lighting. We will talk about this in the next steps.
4. Natural light: “golden hour”
Natural lighting can be used by everyone, although its quality varies greatly depending on location, time of day and weather.
If you rely on natural light, the best time for shooting is the so-called “golden hour”. This is the last hour before sunset when the sun is already close to the horizon.
5. Natural light: hard light
At noon, when the sun’s rays fall almost perpendicular to the ground, hard shadows are obtained, especially under the eyes and chin. If you have to shoot at this time of day, put the subject in the shade or use a reflector to scatter part of the light and soften the shadows.
Alternatively, you can try shooting in a room near the window, using curtains to diffuse light. However, hard light can be used to your advantage – it’s great for shooting textures!
6. Artificial light
If natural lighting is not an option, you can always create it yourself. Such light sources as lamps can perfectly help in lighting sections of the frame and, perhaps, are always easily accessible.
If you do not want to stamp on the level of a beginner, a good investment will be a flash along with wireless shutter release controls or even a set of portable lighting fixtures.
7. Camera
Obviously, if you want the best results, you can not do without a DSLR or a compact mirrorless camera with removable lenses. Both types provide full control over the settings. How to properly dispose of them – read the following paragraphs. There are many camera options for any wallet, so you can always find the optimal model.
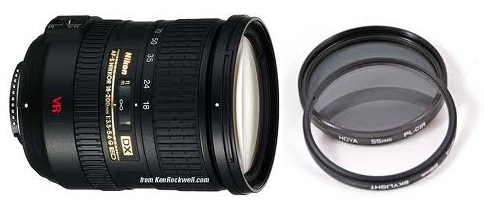
8. The correct lens
To some, this item may also seem too simple, but it would be nice to recall it. The lens is an important part of the camera, which should be chosen with the mind. Each lens has its own focal length, which varies from wide (14 mm) to telephoto (200 – 400 mm).
50 mm is the best option for most situations if you just try yourself in the sphere of photography and want something cheap, simple and better than the whale lens of the camera.
The next step is to invest in 85 mm / 135 mm for portrait and detailed shots, as well as 35 mm for photographing landscapes.
9. Shoot in RAW
If you work with DSLR or mirrorless, make sure that you shoot in RAW, not JPEG.
This will allow the camera to shoot and process images without compression, providing more free space for processing in Lightroom or Photoshop in case you need to fix the exposure.
10. Working in the dark
If you shoot with a DLSR or a compact mirrorless, you have very flexible sensor sensitivity control options with the help of ISO control.
The higher the number, the more noise in the picture, so try to set the ISO to the minimum acceptable mark. Here are the approximate indicators for different situations.
- Outdoors in sunny weather:100-200
- Outside in cloudy weather:400
- In a well-lit room:800-1000
- In a dark room:1600-2000
11. Depth of field
The aperture does not just adjust the size of the hole that transmits light, but also what part of the frame will be in focus, depending on the distance.
If you need the focus is to be sharp from the foreground to the background, shoot with f / 8 or higher. Otherwise, if you need a blurry background and a sense of depth, experiment with the value in the f / 1.8 areas.
12. High-speed shooting
A short shutter speed (1/200 sec or less) is great when you need to “freeze” the moment, while a long exposure (1 sec or more) will help convey a sense of movement or create a slow-motion effect.
When working with long exposure, do not forget to take a tripod and the shutter release with you to avoid jolting the camera.
13. Different options
After you’ve got the picture you need, take a couple more frames, varying the data. The main difficulty is setting, so when everything is ready, try taking a photo from different angles, change the settings and lighting styles. If a lot of time is spent on setting the frame, then this approach can save a lot of time in the future.
14. Color Harmony
If the conditions are limited and you have to use different lighting sources, you may need to correct the colors to make the image look harmonious.
This can be done using the White Balance tool in Adobe Camera Raw or Lightroom or you can.
15. Competent pruning of the background
After the release of Adobe Photoshop CC 2015.5, it was even easier to cut the background. Why not take advantage of this?